The biggest challenge by far was putting together the electronic circuits.
Arduino
Before the academy started, I had bought some Arduino kits on e-bay and tried a couple of easy experiments. My plan next was to build an automated plant watering system for my indoor plants, but by the time I received all the components (I tried to go as cheap as possible, so I ordered them from China) the academy had started. So my plant watering system is on hold for now until I graduate from the academy. But I digress... In my opinion there are 3 main circuits needed, so in the beginning I've build each separate.
Light and Relay
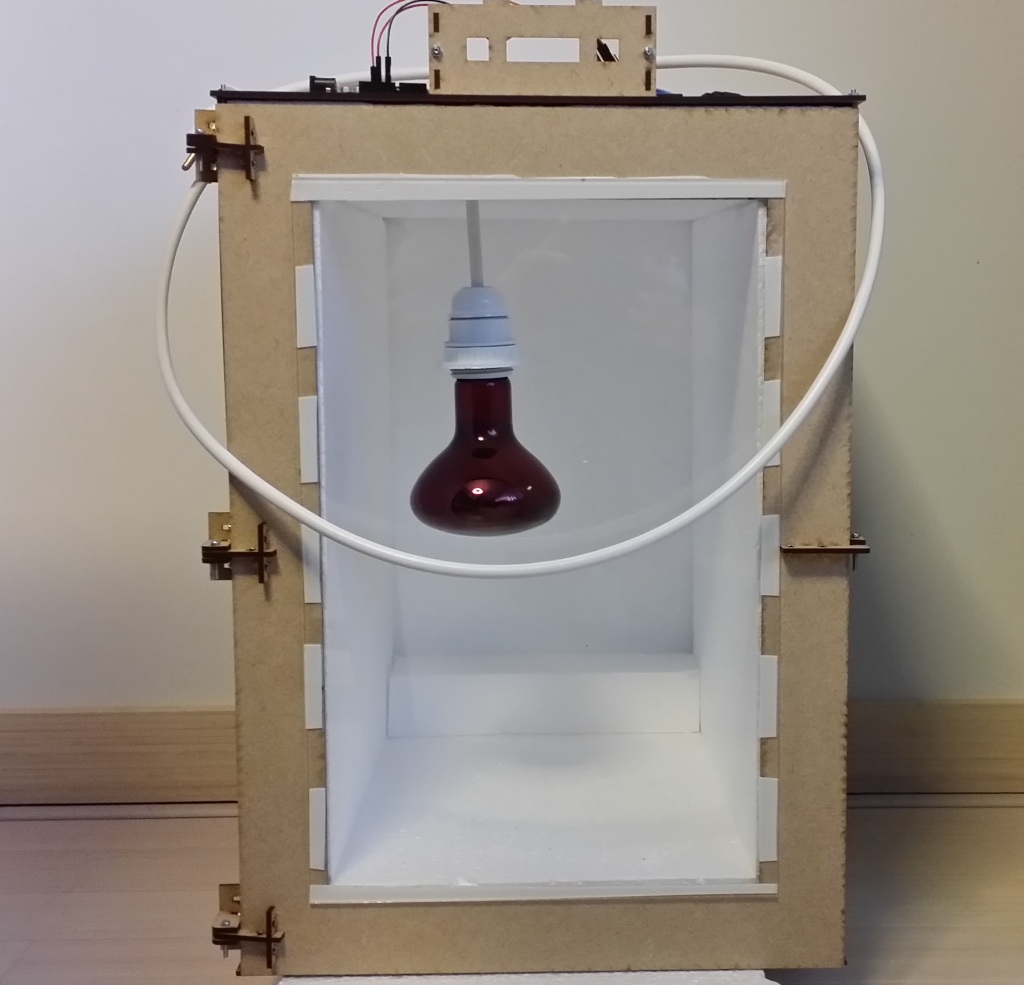
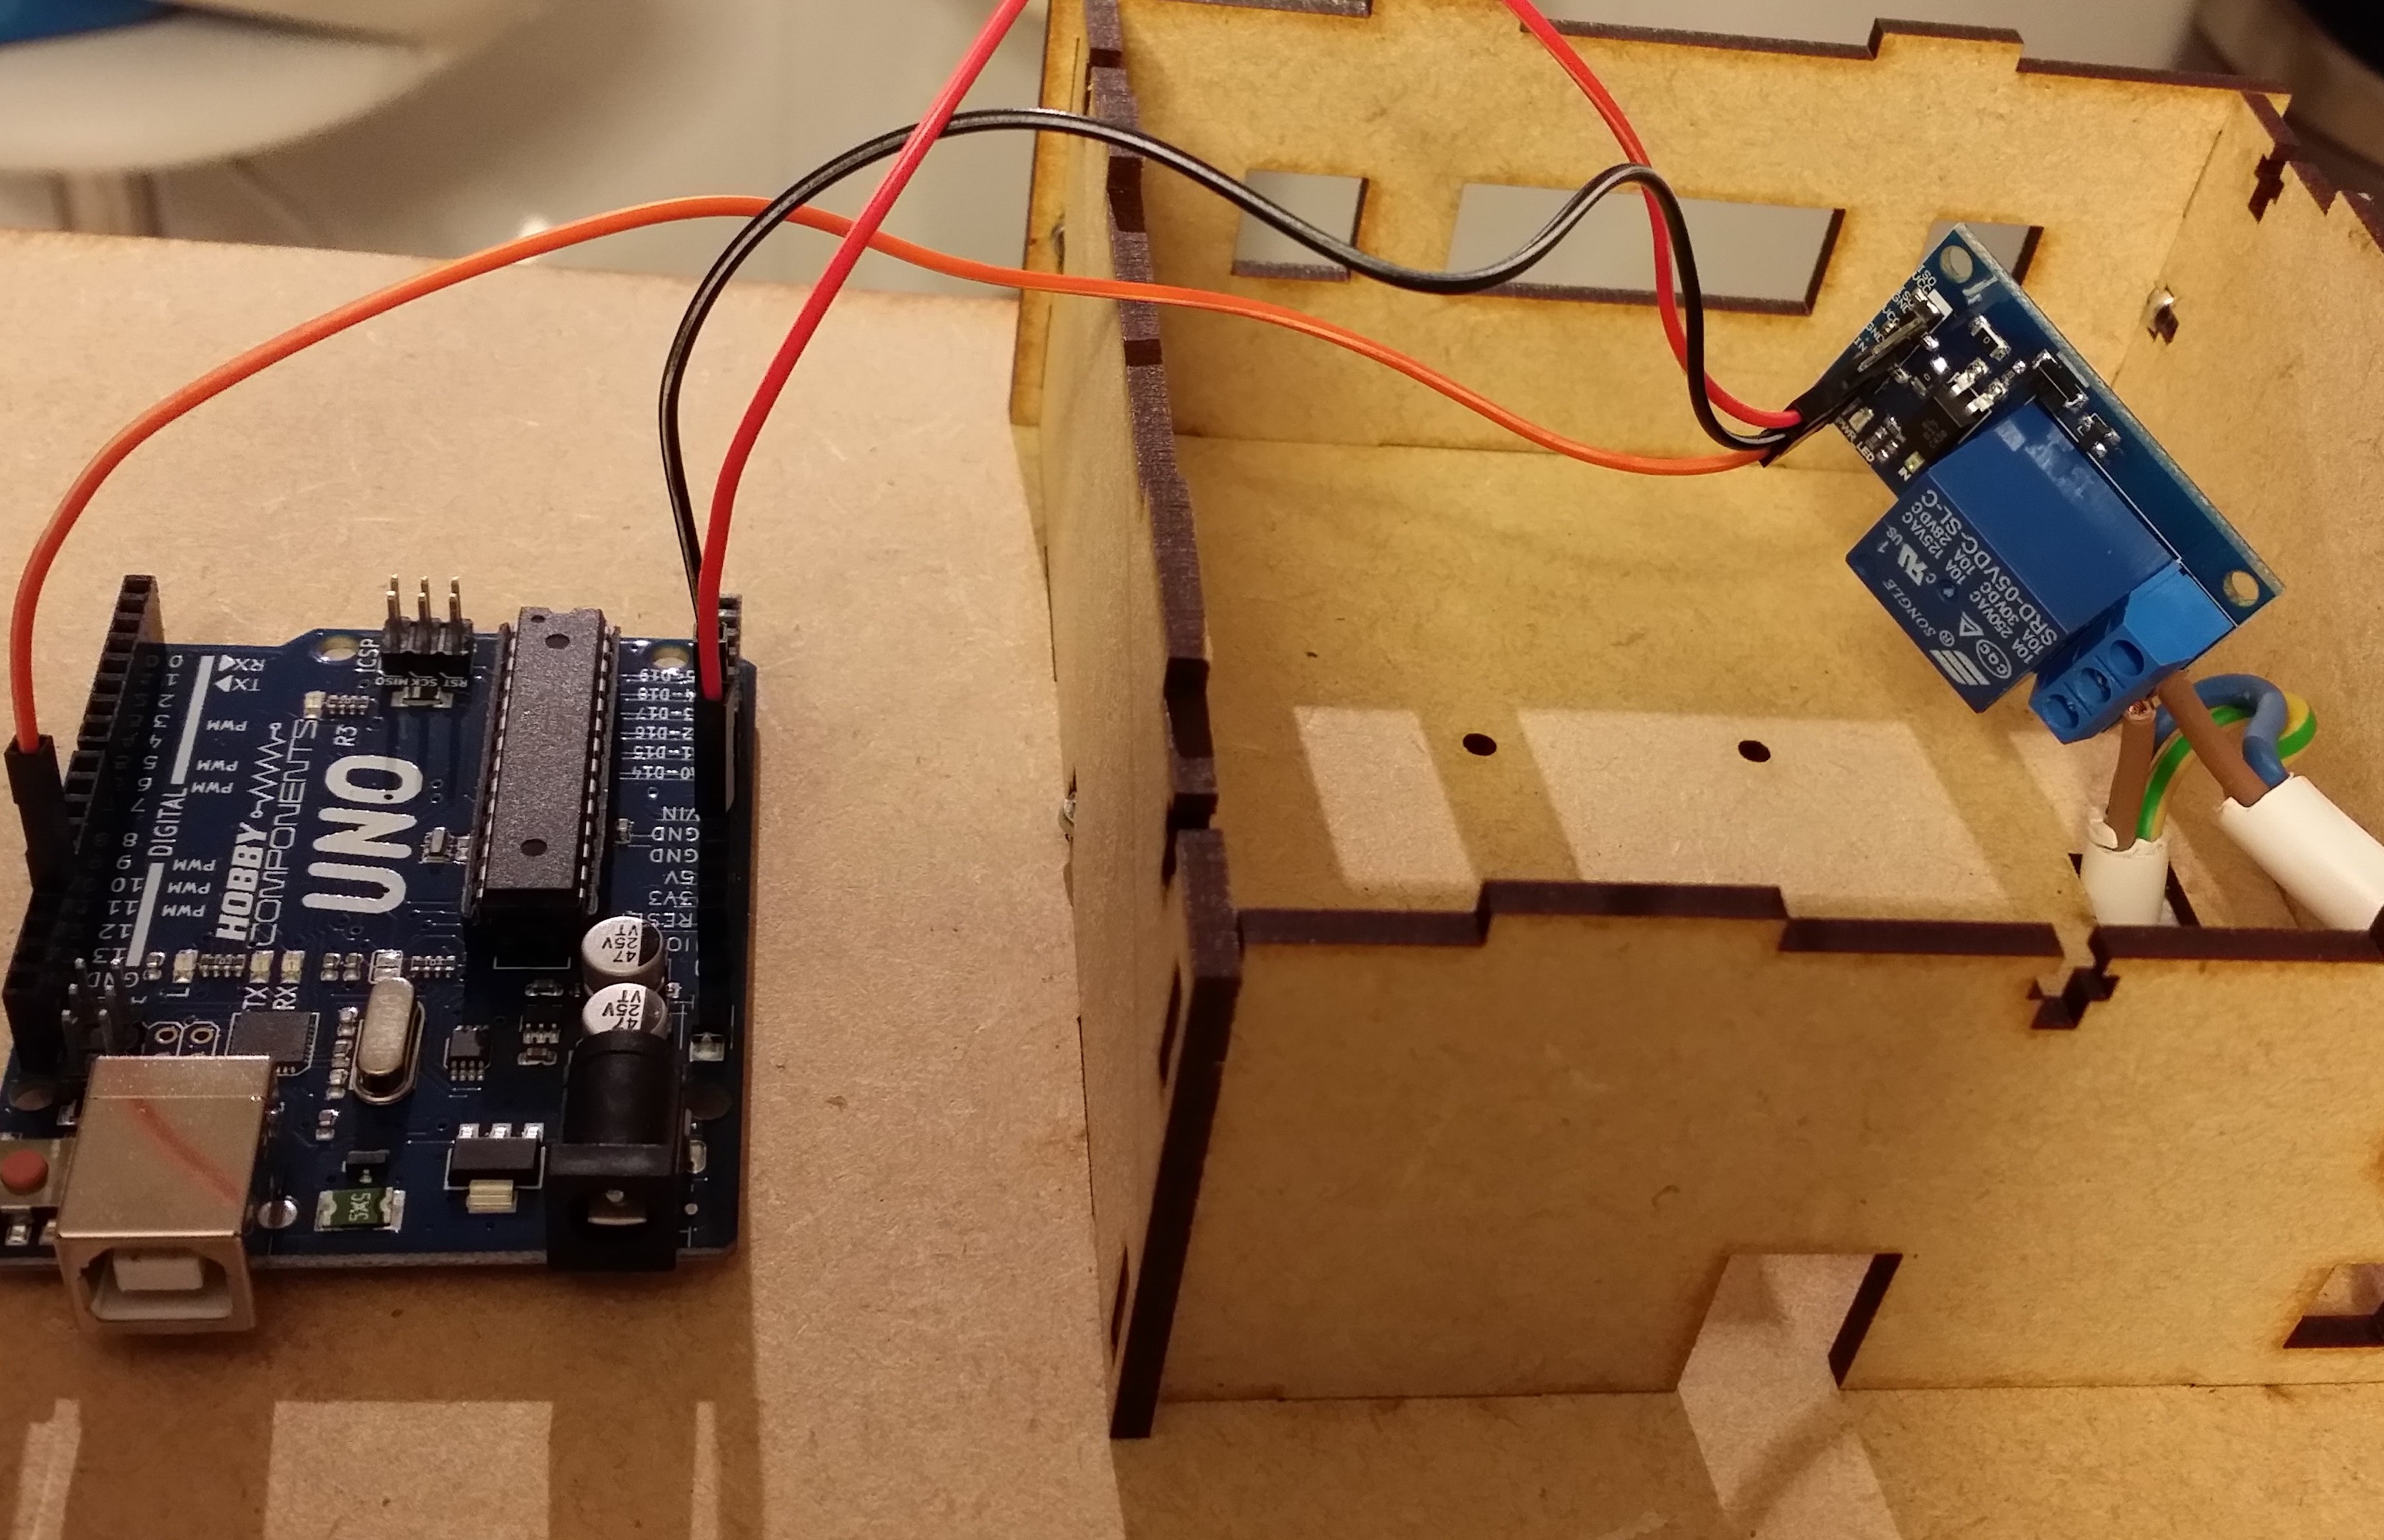
The incubator has to maintain a fixed temperature inside and to achieve this the first thing needed is a heat source. In my case the heat source is an infrared bulb connected to the 220 power supply plug and controlled via a relay by Arduino. I was bit worried about this part, so I had someone show me how it's done and I have to admit that now I find it pretty easy. The images below show the test circuit for the relay connected to Arduino and a light bulb and the video captures a test where Arduino turns the light on for 5 seconds and off for 5 seconds and repeats the cycle over and over again as long as it has power: in this case Arduino is connected to my laptop's usb port and the light is plugged in the wall socket. For testing I used a normal light bulb (E27) in place of the infrared bulb.
Fan
The fan's role is to circulate the air inside the incubator and make sure there are no temperatures differences.
Temperature sensor
The result
I'm very close to finishing the incubator. Too bad the temperature sensor broke, I have to order a new one, or 2 just to be sure.